


Creating a Chat Bot to Answer TigerGraph Questions with Discord.py and pyTigerGraph by Shreya Chaudhary
What is the Project and Why Complete it?
A potentially hot topic is creating chat bots with graph technology. While this is by no means an advanced chat bot, it’s a way to combine the power of TigerGraph and Discord to create a responsive bot for a Discord server.
Step 1: Create the Bot on Discord
First, you need to create the bot itself on Discord. For this project, we’ll be using Discord.py. To create bots, you’ll need a Discord account and to enable Developer Mode. You should then be able to access the applications page: https://discord.com/developers/applications
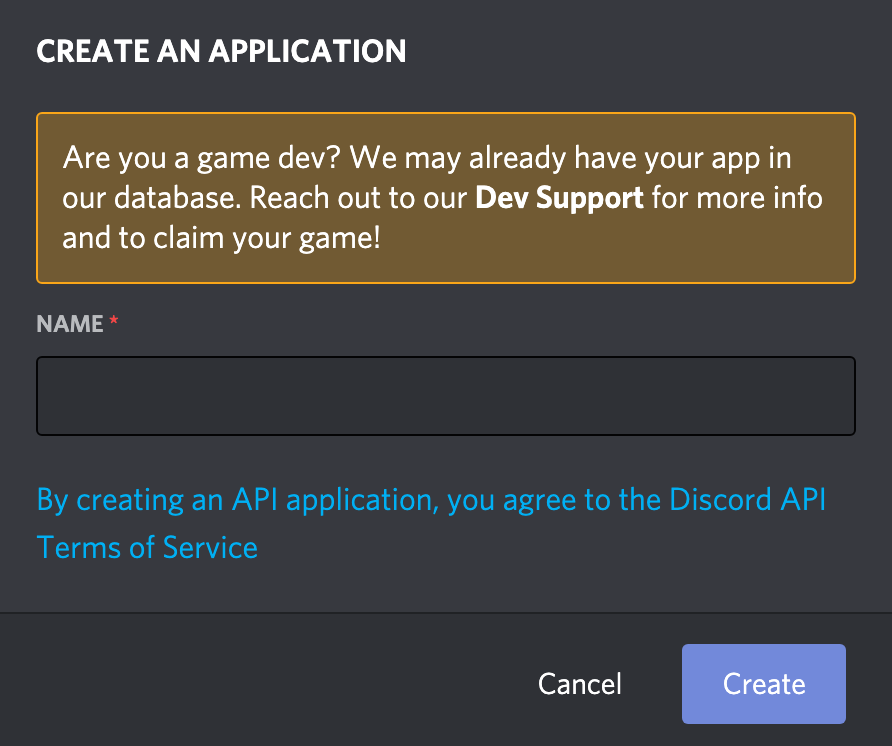
From here, on the top right corner, click “New Application.”

Next, name your application at the prompt.
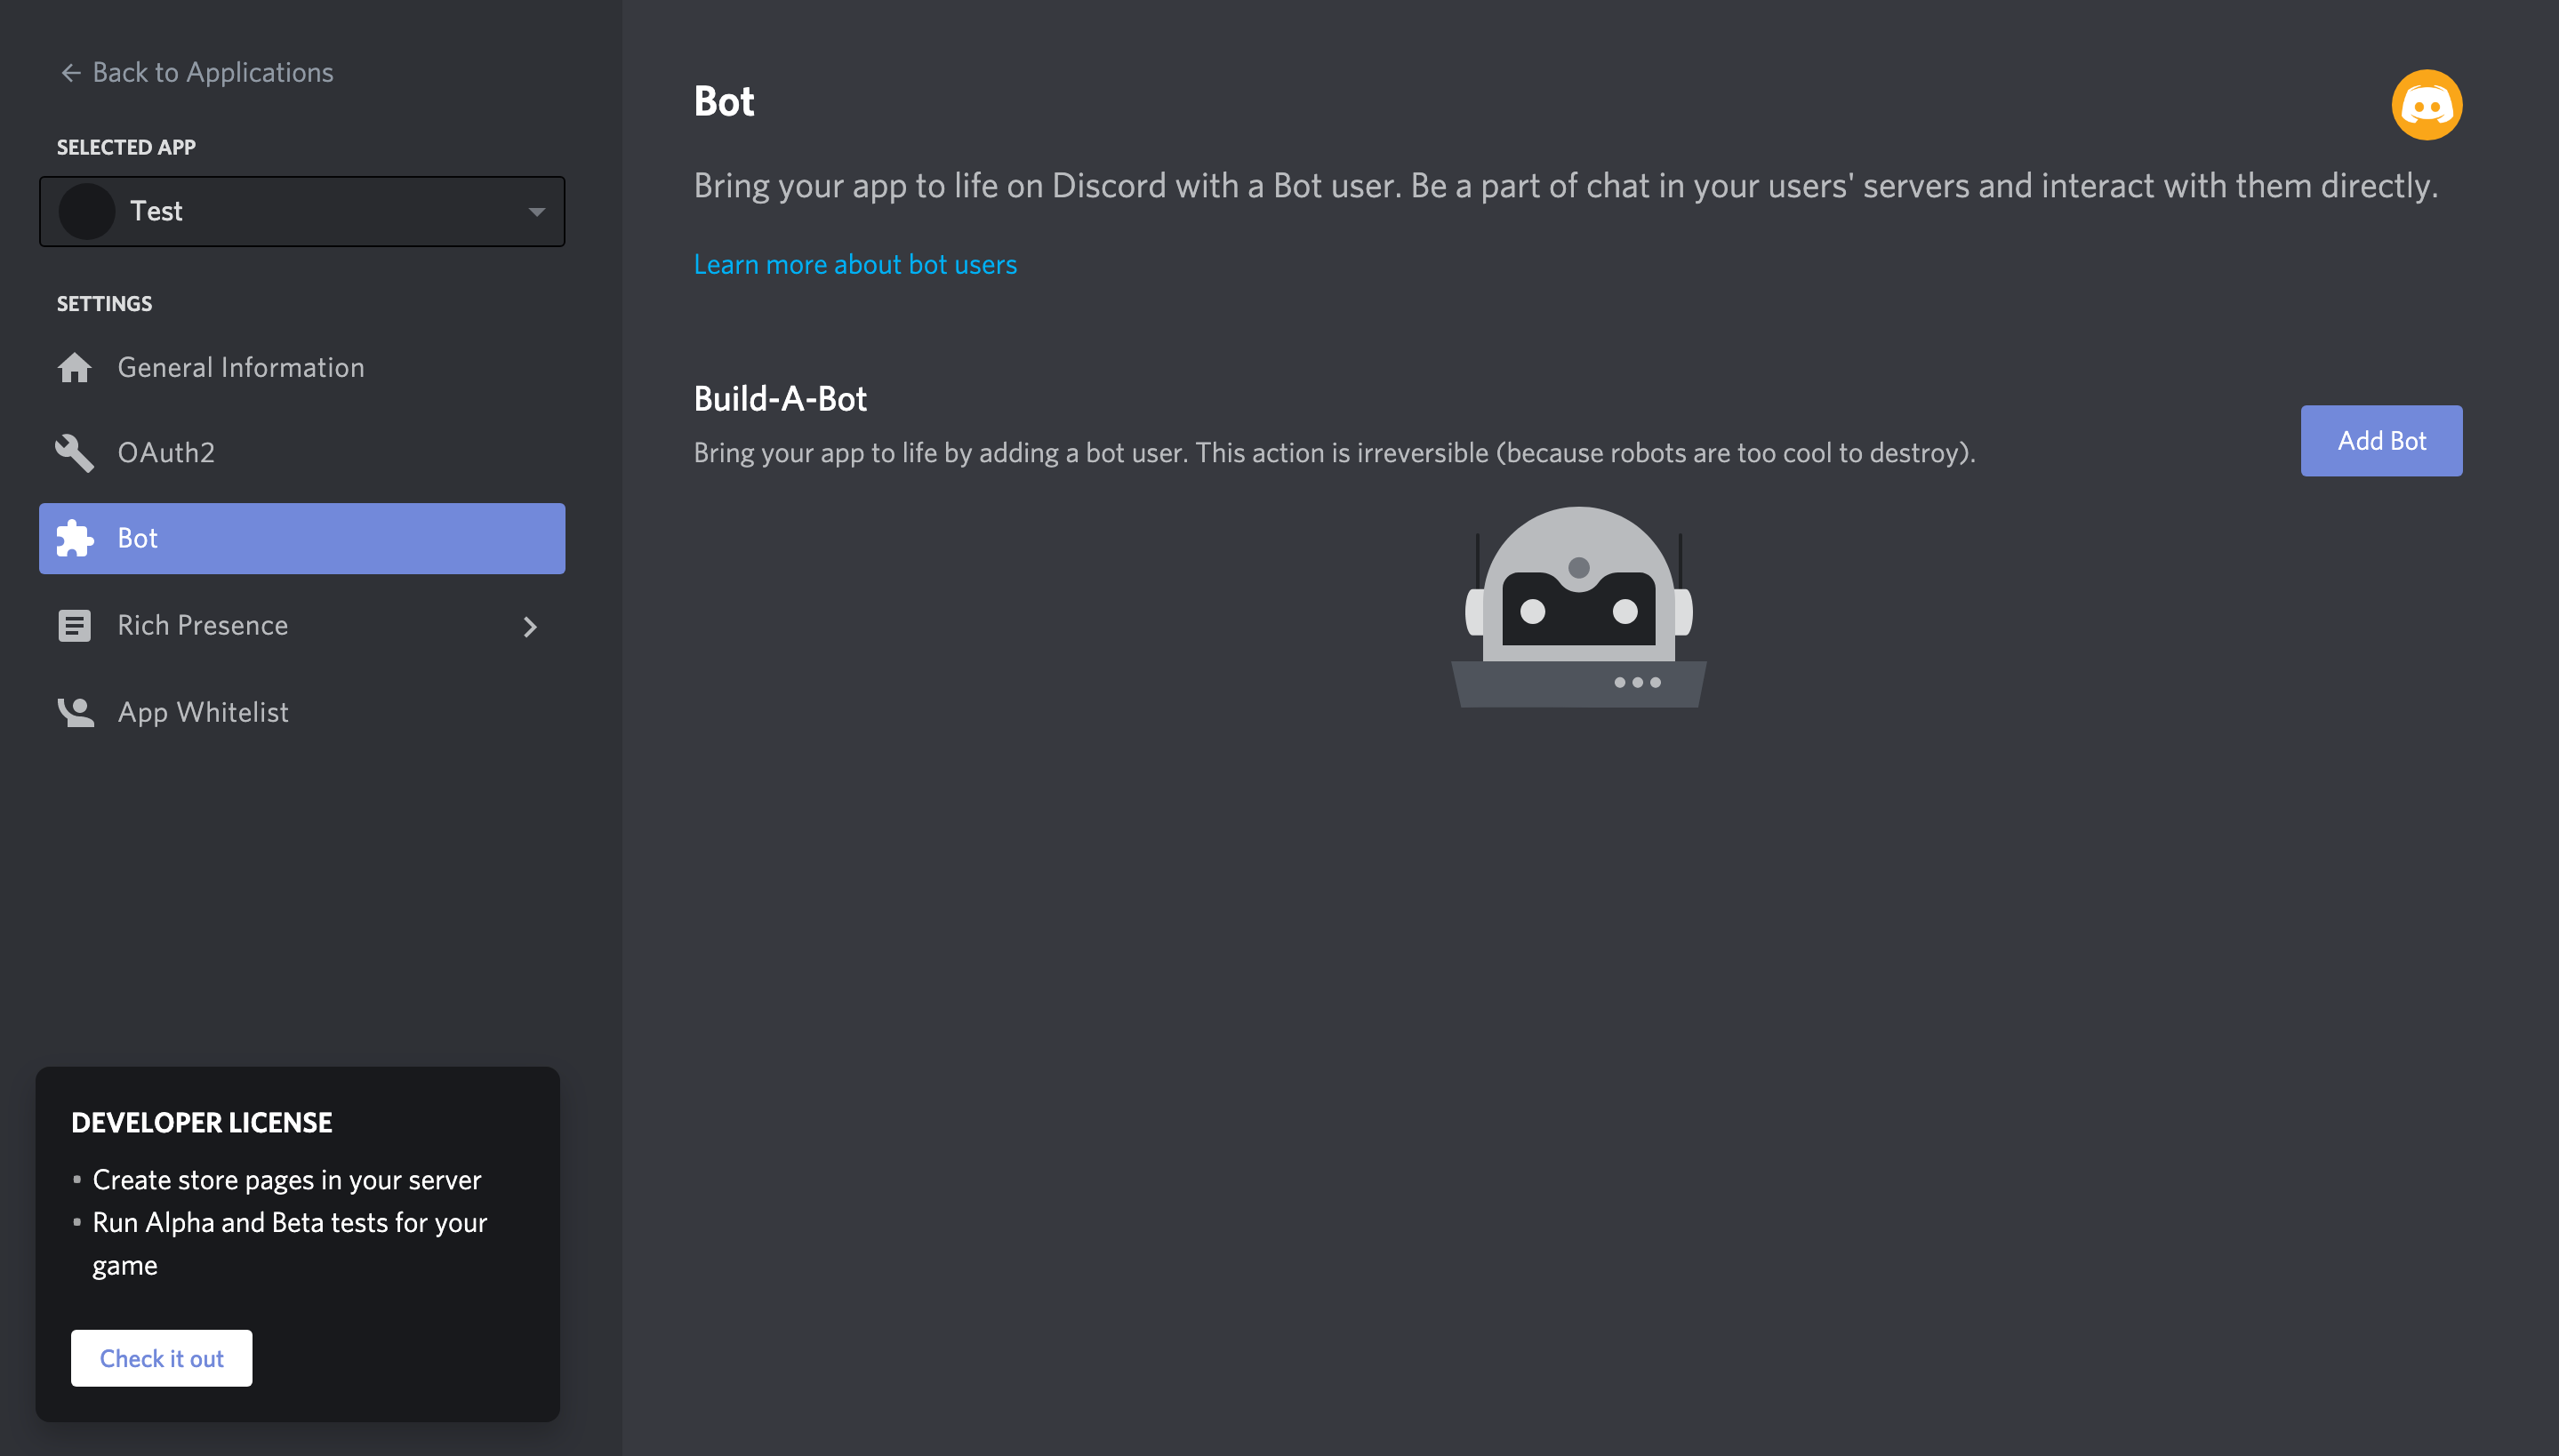
After you name it, you should redirect to a page for the bot. Here, on the left side bar, toggle to “Bot,” then click “Add Bot.”
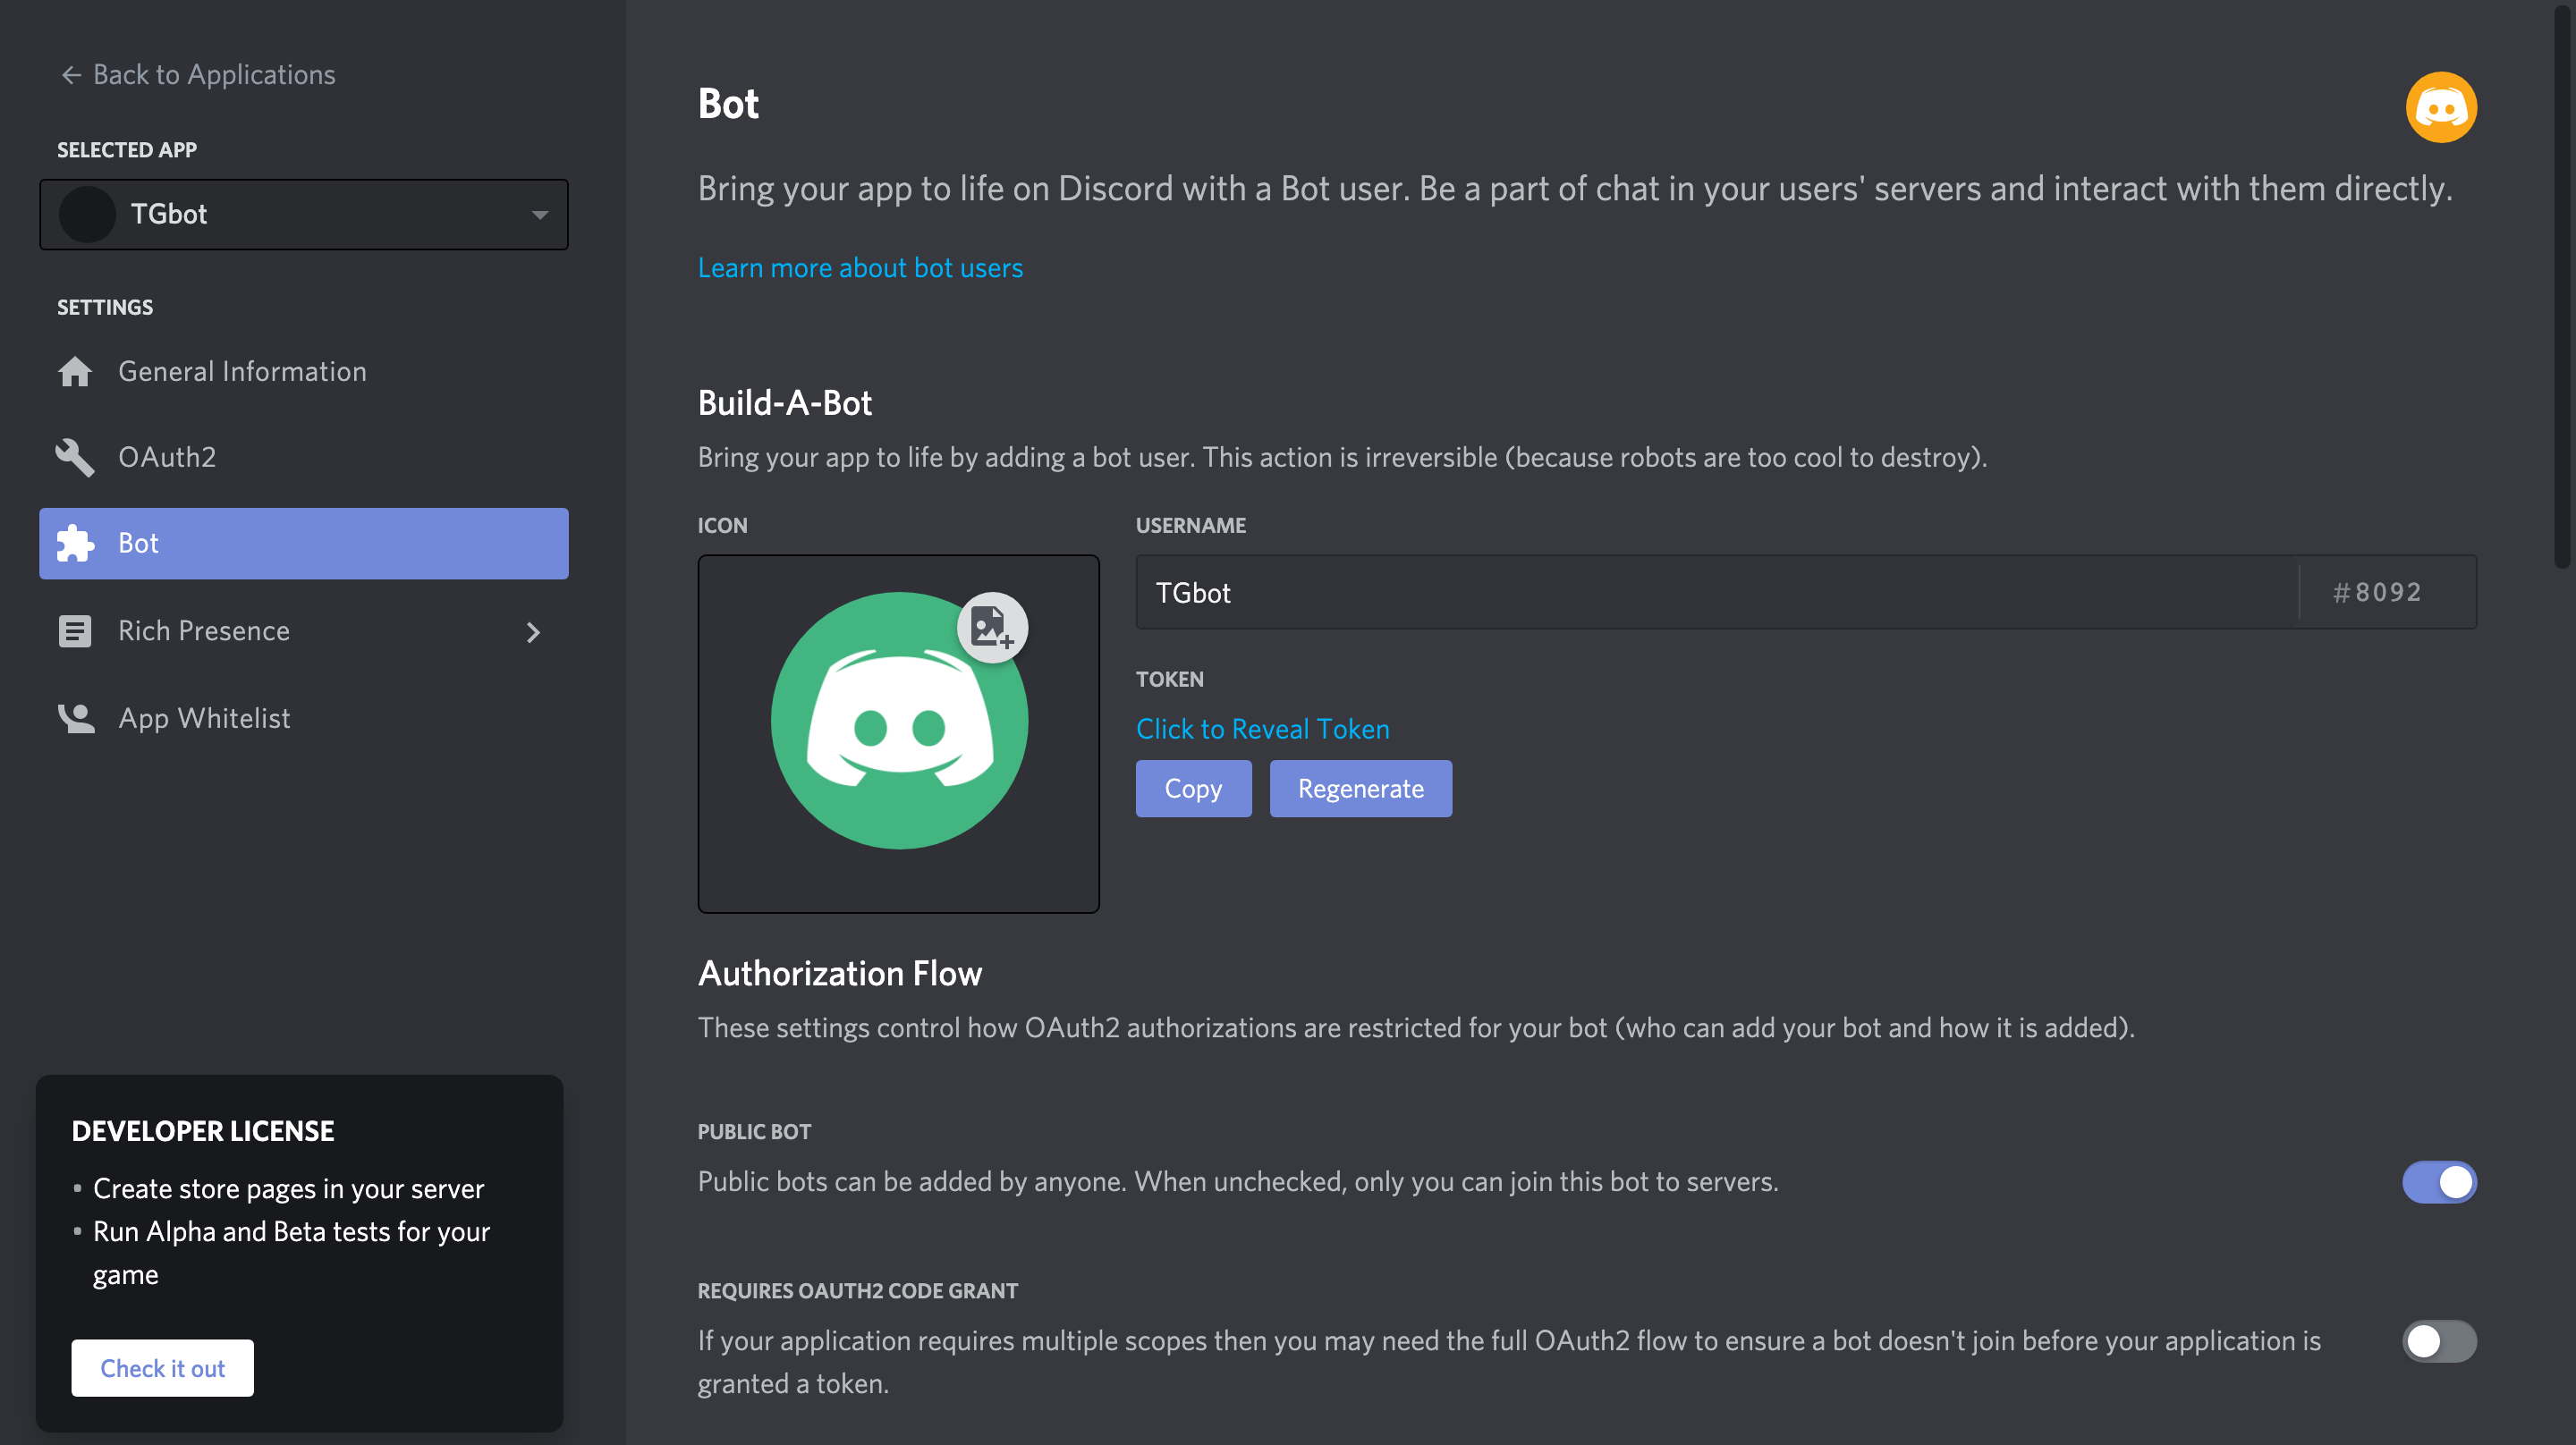
After confirming, you’ll have your bot! Eventually, you’ll need the Token of the bot. To copy it, simply press the blue “Copy” button.
Step II: Create the Graph
Step 2a: Import Libraries
The graph will be created in pyTigerGraph. First, make sure you have both pyTigerGraph and Discord.py installed.
pip install pyTigerGraph
pip install discord.py
Step 2b: Start the Solution
Then, create a document called createGraph.py or something similar. First, start up a solution at http;//tgcloud.io/ by creating an account and then completing the following steps:
- Go to “My Solutions” then click “Create Solution
- Click “Blank v3” then press Next twice.
- Edit the solution name, tags, and subdomain as needed and then press Next.
- Press Submit and wait for the Solution to Start.
Step 2c: Create a Connection
Once the solution starts, you can create a connection in your document with the following. First, import pyTigerGraph, then use it to create the connection using the information you submitted in step three for HOST_NAME, USERNAME, and PASSWORD.
import pyTigerGraph as tgconn = tg.TigerGraphConnection(host="https://HOST_NAME.i.tgcloud.io", username="USERNAME", version="3.0.5", password="PASSWORD", useCert=True)
Step 2d: Create the Schema
Next, we’ll create a schema. The schema in this case will be simple: the vertices Message and Word connected with a MESSAGE_WORD vertex.
conn.gsql('''CREATE VERTEX Word(primary_id word STRING) with primary_id_as_attribute="true"
CREATE VERTEX Message(primary_id id INT, message STRING, url STRING)
CREATE UNDIRECTED EDGE WORD_MESSAGE(FROM Message, To Word)
CREATE GRAPH ChatBot(Word, Message, WORD_MESSAGE)''')
After running this, you would have created your graph in TigerGraph! Congrats! Next, you will need to adjust your connection details then load data and write a query.
conn.graphname = "ChatBot"
conn.apiToken = conn.getToken(conn.createSecret())
Step III: Pull Data from an API
To get my data, I pulled from articles from https://community.tigergraph.com/. To do this, I pulled recent messages from the forum using the endpoint https://community.tigergraph.com/posts.json. Using the JSON library, I loaded the “latest_posts.”
import requests
import json
x = requests.get(“https://community.tigergraph.com/posts.json”)
data = json.loads(x.text)[“latest_posts”]
The data has a few sections which will be important: raw (the whole message), id, “topic_slug,” and “topic_id.” Together, “topic_slug” and “topic_id” can retrieve the original url.
print(data[0]["raw"]) # Message
print(data[0]["id"]) # ID
print("https://community.tigergraph.com/t/" + data[0]["topic_slug"] + "/" + str(data[0]["topic_id"])) # Url
Next, we need to load the data into the graph. Before we load the data, we need to clean it, removing any stopwords or punctuation. Next, we’ll upsert it into the graph.
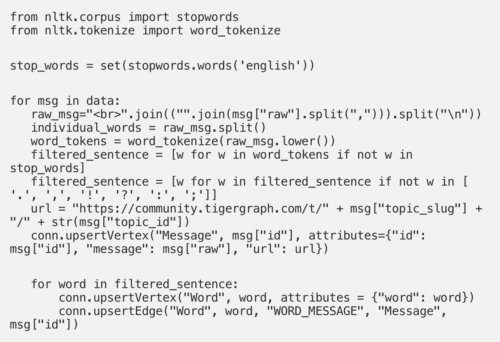
Copy and paste this code here.
Great! Now you have all the data loaded into your graph. Next, let’s create the bot!
Step IV: Create the Bot
Create a new file now. Remember the token you generated in Step I? You’ll need that now.
We’ll first create the outline of a discord bot.
import discord
import pyTigerGraph as tg
from nltk.corpus import stopwords
from nltk.tokenize import word_tokenizeclient = discord.Client()conn = tg.TigerGraphConnection(host="https://HOST_NAME.i.tgcloud.io", username="USERNAME", version="3.0.5", password="PASSWORD", useCert=True)conn.graphname = "ChatBot"
conn.apiToken = conn.getToken(conn.createSecret())@client.event
async def on_message(msg):
    print(msg.content)@client.event
async def on_ready():
    print(f"We have logged in as {client.user}")client.run("YOUR_DISCORD_TOKEN")
All the work we’ll be doing will be in the on_message. There, first, we’ll see if the message ends with a “??”, the trigger for this particular bot. Next, we’ll perform the same data cleaning steps as in Step III. Finally, we’ll find which post the message is most similar to and return that.
if (msg.author.name != "TGbot" and msg.content[-2:] == "??"):
stop_words = set(stopwords.words('english'))
word_tokens = word_tokenize((msg.content[:-2]).lower())
filtered_sentence = [w for w in word_tokens if not w in stop_words]
filtered_sentence = list(set([w for w in filtered_sentence if not w in [
'.', ',', '!', '?', ':', ';']]))
possible_options = []
for word in filtered_sentence:
x = conn.runInstalledQuery("similarArticles", {"word": word})
for opt in x[0]["blogs"]:
possible_options.append(opt["attributes"]["url"])
# print(x[0]["blogs"][0]["attributes"]["message"])
word_counter = {}
for word in possible_options:
if word in word_counter:
word_counter[word] += 1
else:
word_counter[word] = 1
popular_words = sorted(
word_counter, key=word_counter.get, reverse=True)
print(word_counter)
if len(popular_words) == 0 or word_counter[popular_words[0]] < len(filtered_sentence)/2: await msg.channel.send("I couldn't find anything like that.") elif len(popular_words) >= 2 and word_counter[popular_words[1]] >= word_counter[popular_words[0]]-2:
await msg.channel.send("You might want to check out these:\n" + popular_words[0] + "\n" + popular_words[1])
else:
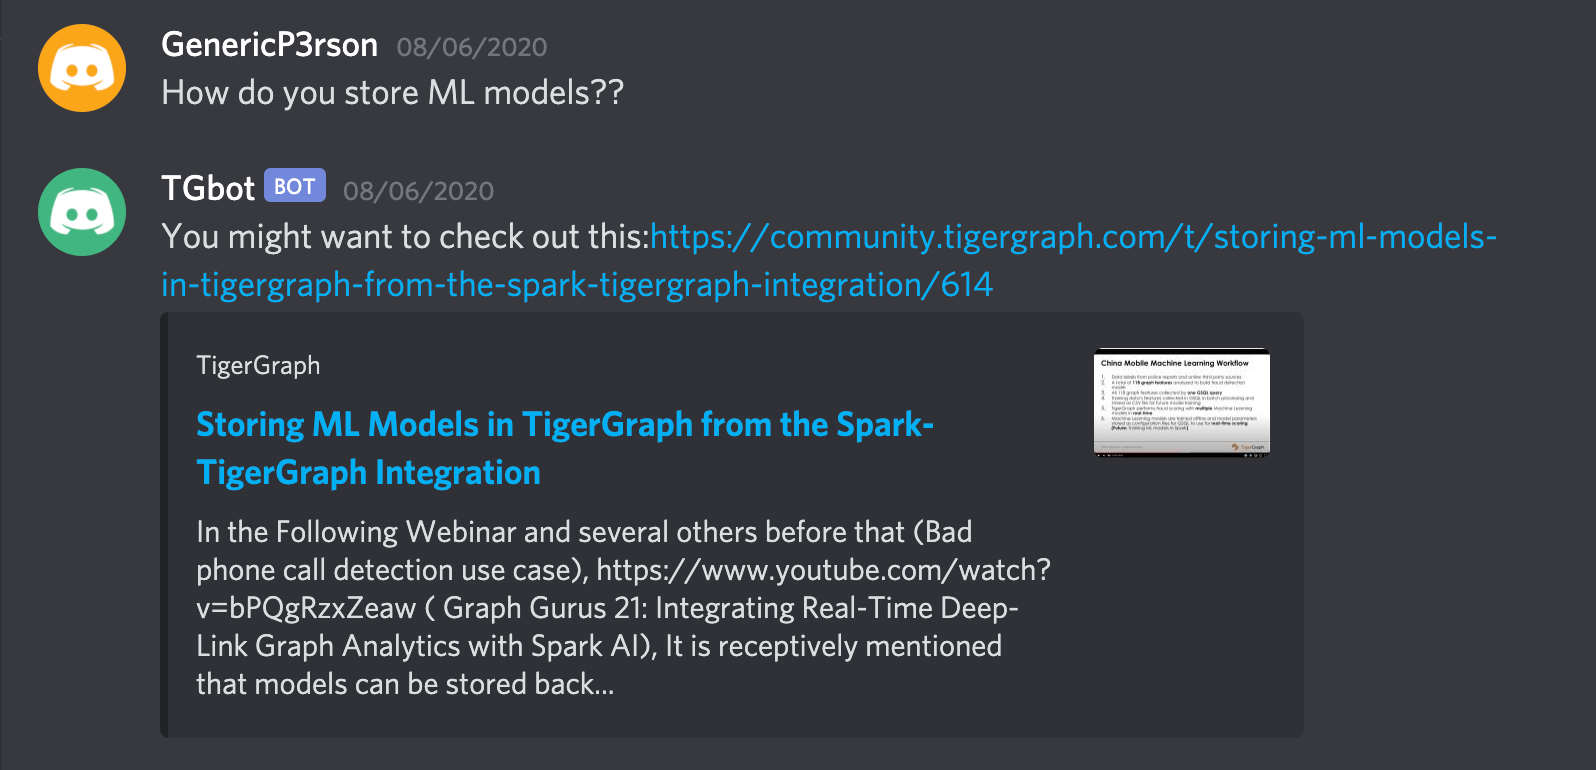
await msg.channel.send("You might want to check out this: " + popular_words[0])Now you can run your bot and see the results!
Step V: Next Steps
Congrats! You created a basic Q&A bot for Discord with TigerGraph! Next, modify this to be your own.
While you’re at it, join the TigerGraph Discord if you have any questions or need help.
Good luck!
Note: All images, unless otherwise stated, are by the author.