


Originally posted on Medium by Kelley Brigman. Follow Kelley on Medium and Linkedin.
This article will demonstrate how to update data in an existing TigerGraph vertex using voice commands given to an Alexa-enabled device. To complete the setup, you will need:
- An AWS account, including privileges to modify VPC network settings and create new objects like Lambda Functions
- An Amazon Alexa Developer account
- Access to an Alexa device that is configured for your Amazon Alexa Developer account
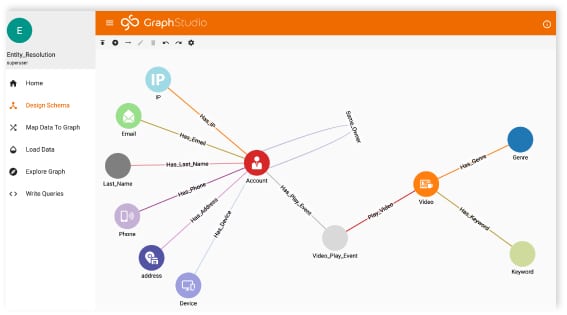
- Access to a TigerGraph Cloud instance with at least one existing vertex
- All files necessary for this demonstration are available on Git.
- OVERVIEW
Voice commands issued to an Alexa-enabled device will trigger the execution of an Alexa Skill. The Alexa skill interprets voice commands and translates them into instructions that are then sent to a Lambda Function that processes the instructions and performs appropriate actions for those instructions. In this example, the Lambda Function will read JSON data from a file in an S3 bucket and load the data (perform an UPSERT operation) into a TigerGraph vertex. This might be useful for many scenarios, like updating existing customer or sales data or updating the metadata that controls a data pipeline application.
The basic steps we will follow are:
- Configure the Amazon Virtual Private Cloud (VPC)
- Upload data to an Amazon S3 bucket
- Create an Alexa Skill
- Create an AWS Lambda Function
- Add the Alexa Skill as a trigger for the Lambda Function
- Add the Lambda Function as a destination for the Alexa Skill
- Test!
VPC Configuration
Lambda Functions, like other AWS assets, are deployed into a subnet of a Virtual Private Cloud (VPC). AWS recommends that Lambda Functions be deployed into at least two subnets for high availability. Because our Lambda Function will use REST API methods to push data into TigerGraph, we must also create a NAT Gateway in our VPC that is accessible by both subnets used by our Lambda Function.
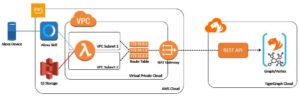
VPN Diagram
VPC subnets gain access to a NAT Gateway via a route table. Both subnets must be associated with a route table that has a path to the NAT Gateway. At minimum, the route table will look like this:

Route Table
Where 172.x.x.x/16 is the address for the VPC itself, 0.0.0.0/0 refers to the internet and nat-097afeecc20fd9172 is an AWS-generated name for the NAT Gateway. Together, these two route table entries grant traffic in the subnet permission to leave the subnet, move into local VPC space, then transit the NAT Gateway using the URL of the REST API that will be used to push data into TigerGraph Cloud. If you are unfamiliar with adding a NAT Gateway in your VPC, more information is available here.
Upload Data to Amazon S3
First, I will add a data file called business_entities.json to a S3 bucket in my account. I am also uploading an image that I want to display when the Alexa Skill finishes successfully.
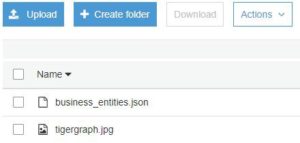
S3 Objects
This data file is already formatted properly to be consumed by the TigerGraph REST API. For this example, I will be uploading two rows for a vertex that stores business entities:
{
"vertices": {
"business entity": {
"17735": {
"type" : { "value" : "company" },
"name" : { "value" : "Kam_Air" },
"url" : { "value" : "http://dbpedia.org/resource/Kam_Air" },
},
"878253": {
"type" : { "value" : "university" },
"name" : { "value" : "Belarusian_National_Technical_University" },
"url" : { "value" :
http://dbpedia.org/resource/Belarusian_National_Technical_University" },
}}}}
Here, business_entity is the name of the vertex and 17735 and 878253 are the business entity (primary id) values. If records already exist for these ids, TigerGraph will update them, otherwise they will be inserted. Type, name and url are the vertex attributes. Note that attributes are not simple name-value pairs. The value for each attribute must be expressed as “attribute_name” : { “value” : “the_value_for_attribute” }.
Create an Alexa Skill
Alexa Skills are comprised of an Invocation and one or more intents. The Invocation initiates a command and intents allow you to use that command in different contexts. For example, the invocation might be “reload data for graph” and intents might be the graph name or a vertex within the graph. The invocation and the intents together form the complete Alexa command. This way we could write one Alexa Skill to load data into any table in any graph. For our example, however, we will have one skill for one graph vertex.
Log into the Alexa Developer Console and create a new Alexa Skill called UpdateVertexData using the Custom model and click Create skill
Choose a skill model
When prompted to choose a skill template, select Hello World Skill then click Continue with template.
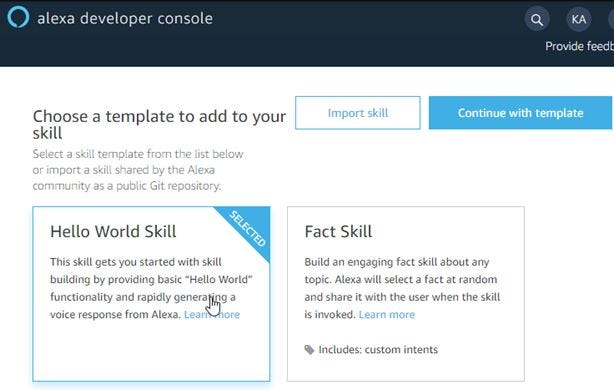
Choose a skill template
A new skill template will be created. After a minute or two, you will be directed to the Interaction Model form where we can build the behaviors for this Alexa Skill. From the menu on the left, click Invocation. Use update vertex for the Invocation Name.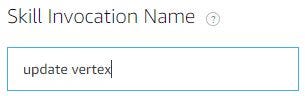
Next, click Intents and then Add Intent. Enter business_entity for the name of the intent.
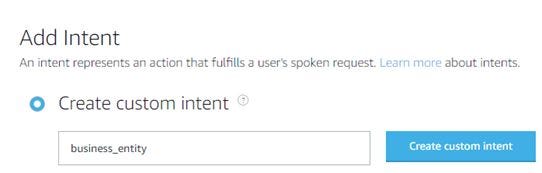
Click the Create custom intent button. Next, we enter Sample Utterances. These are short phrases that are used to complete the Alexa command. You can enter multiple words or short phrases to make the Alexa command more conversational. For example, any of the following utterances will be considered valid when invoking our Alexa Skill.
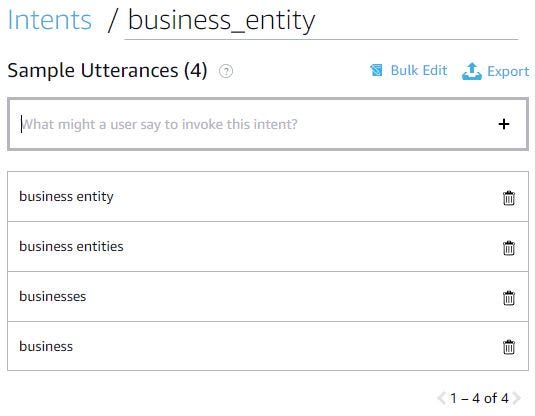
With these four utterances, our Alexa command could be “Alexa, update vertex business entity”, “Alexa, update vertex business entities”, “Alexa, update vertex businesses” or “Alexa, update vertex business”. Any one of these phrases will have the same effect. Click Save Model. Then, from the navigation menu on the left, click Endpoint. You should see the Skill ID for this Alexa Skill. Click Copy to Clipboard. You will need this in the next step when we create a Lambda Function.

Leave this window open. We will finish the Alexa Skill configuration in a later step.
Create a Lambda Function
Log into the AWS Console and select Lambda from the Services menu. Then click Create function. The function name will be UpdateVertexBusinessEntity and the runtime will be Python 3.7. Then click Create function.
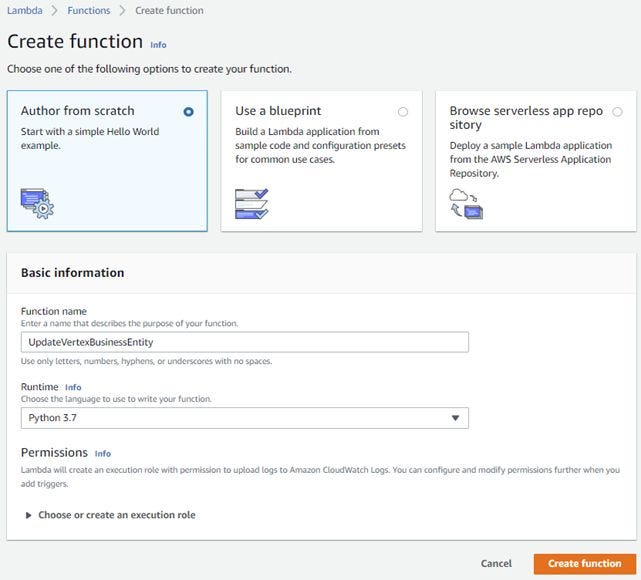
Create a new Lambda Function
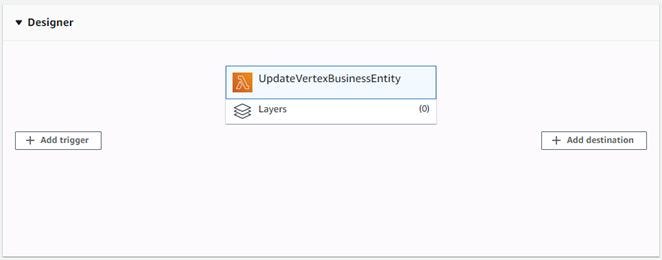
In the Designer panel, click Add Trigger.
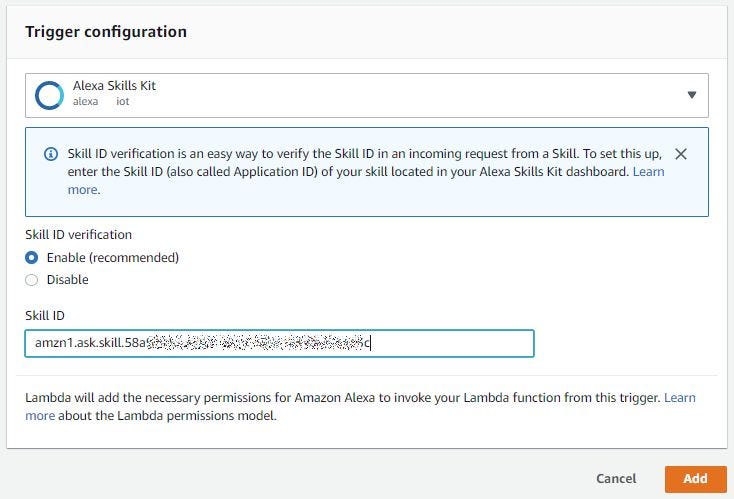
Select Alexa Skills Kit as the trigger and then paste in the Alexa Skills ID that you copied in a previous step. Then click Add.
You should now see that the Alexa Skill has been added as a trigger for this Lambda Function.

Alexa Skill trigger
The Alexa Skills Kit trigger is currently selected. Click on the attached box for the Lambda Function UpdateVertexBusinessEntity.
Scroll down, skipping over the Function Code section, to Environment Variables and click Edit. You will need to enter your AWS access key and secret access key, TigerGraph IP address (domain), TigerGraph secret, and S3 bucket name, the file name and prefix for the business_entity.json file and the tigergraph.jpg file (if you put them in a subdirectory, otherwise just use the file names). Set the following variables then click Save:
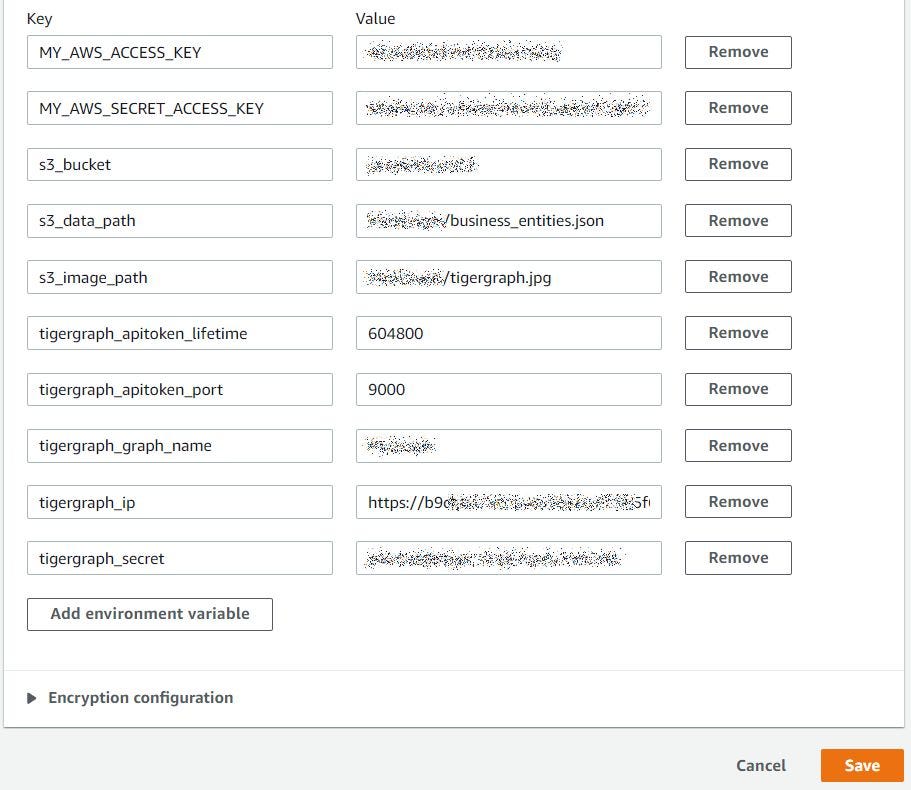
Environment Variables
Continue scrolling down to the Basic Settings section and click Edit. Change the Timeout setting to 2 minutes and 0 seconds. Then click Save.
Continue scrolling down to the VPC Section and click Edit. Select the name of your VPC and include at least two subnets that are associated with your NAT interface as described in the VPC Configuration section above. Also add at least one security group that allows egress from your VPC on ports used for TCP, HTTP and HTTPS. Then click Save.
Scroll back up to the Function Code section:

On the right, look for the Actions drop down box. Select Upload a .zip file. Upload the zip file in /lambda/UpdateVertexBusinessEntity.zip from the git repository. Once uploaded, the Python code will be visible:
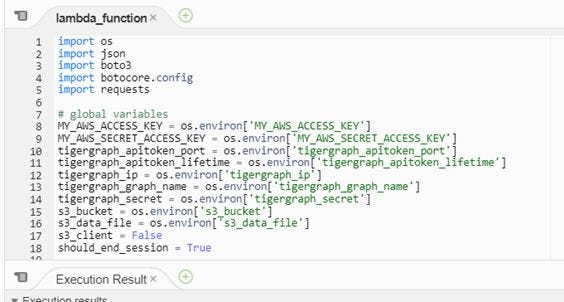
Let’s take a look at the most important parts of the code. First, we create a function that connects to S3 and returns a connection:
def get_s3_conn():
    s3_conn = boto3.resource(
        ‘s3’,
        region_name=’us-east-1',
        aws_access_key_id=MY_AWS_ACCESS_KEY,
        aws_secret_access_key=MY_AWS_SECRET_ACCESS_KEY
    )    return s3_conn
We also create a function that gets an API token from TigerGraph. We cannot GET or POST using the TigerGraph API without a token:
def get_tg_auth_token() -> str:
try:
url = "{ip}:{port}/requesttoken?secret={secret}&lifetime={lt}".format(
    ip=tigergraph_ip,
    port=tigergraph_apitoken_port,
    secret=tigergraph_secret,
    lt=tigergraph_apitoken_lifetime
)    response = requests.get(url).json()
    return response['token']
except Exception as e:
    print('Error getting authentication token from TigerGraph: {0}'.format(e))
Next, we get the contents of the business_entity.json file from S3.
try:
    s3_object = s3_conn.Object(s3_bucket, s3_data_file).get()
    payload = s3_object['Body']
except Exception as e:
    print("Error getting metadata file from S3: {a}".format(a=e))
    return False
Now that we have the data, we can create our request header and then POST it. One of the benefits of TigerGraph is that each vertex or query is automatically accessible from a built-in REST interface. No coding is required.
try:
    url = "{ip}:{port}/graph/{graph}".format(
        ip=tigergraph_ip,
        port=tigergraph_apitoken_port,
        graph=tigergraph_graph_name
    )    response = requests.request(
        "POST",
        url,
        headers=request_header,
        data=payload
    )except Exception as e:
    return_msg = e
else:
    return_msg = " reloaded successfully"
Last, after the data is posted to TigerGraph, we need to return a JSON structure to our Alexa skill so that an Alexa-enabled device can speak the return message. The response must be in the following format:
json_resp = {
"version": "1.0.0",
"sessionAttributes": {
"TigerGraph": "Load data"
},"response": {
"outputSpeech": {
"type": "PlainText",
"text": return_msg,
"ssml": "" + return_msg + ""
},
"card": {
"type": "Standard",
"title": tigergraph_graph_name,
"content": return_msg,
"text": return_msg,
"image": {
"smallImageUrl": "https://{0}.s3.amazonaws.com/{1}".format(s3_bucket, s3_image_file),"largeImageUrl": "https://{0}.s3.amazonaws.com/{1}".format(s3_bucket, s3_image_file)
}
},
"reprompt": {
"outputSpeech": {
"type": "PlainText",
"text": "Plain text string to speak",
"ssml": "SSML text string to speak"
}
},
"shouldEndSession": should_end_session
}
}
Click Save in the top right corner of the Lambda function.
Register the Alexa Skill as a trigger for the Lambda Function
In the upper right-hand corner of the Lambda Editor window, click the copy icon next to the lambda ARN:
![]()
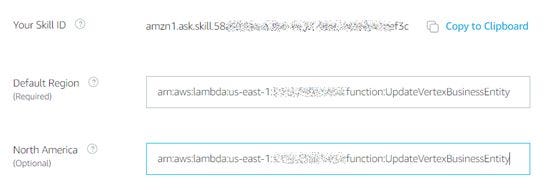
Return to the Alexa Developer Console. From the menu on the left, choose Endpoint.
Enter the ARN for the lambda function in both the default region and the North American region:
From the menu on the left, click Interaction Model. Then click Build Model. We can now test the new skill!
Test!
We can test the new skill directly in the Alexa Developer Console. Simply click on the Test link on the top menu and make sure that skill testing is enabled for Development. You can then enter the text for the new skill. Simply update vertex should be sufficient:
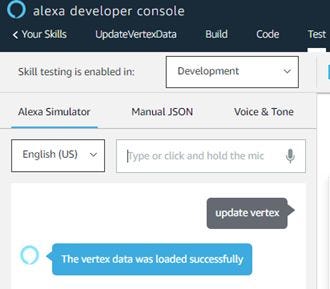
We can hear Alexa say that our vertex data was loaded successfully. We can also see the JSON input (to the Lambda function) and output (results from the lambda function):
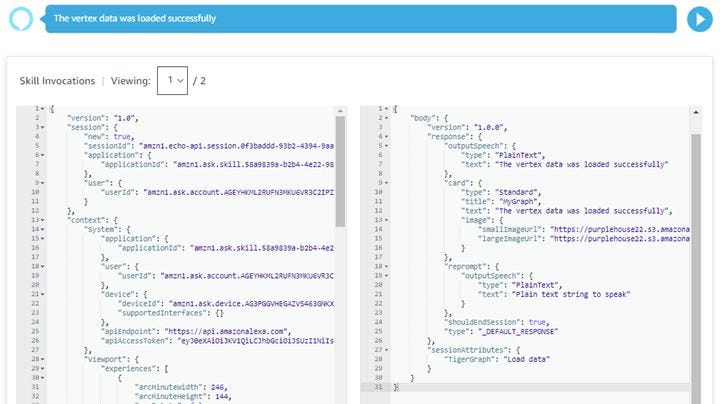
Input and Output
We can also see the image we uploaded along with the data. This shows the output for an Alexa-enabled device with a screen or mobile phone app:

Alexa Screen Results
If testing passes in the Alexa Developer Console, we can then try our skill on an Alexa device. I can also see that the two rows from the business_entities.json file have been loaded into the business_entity vertex of my graph:
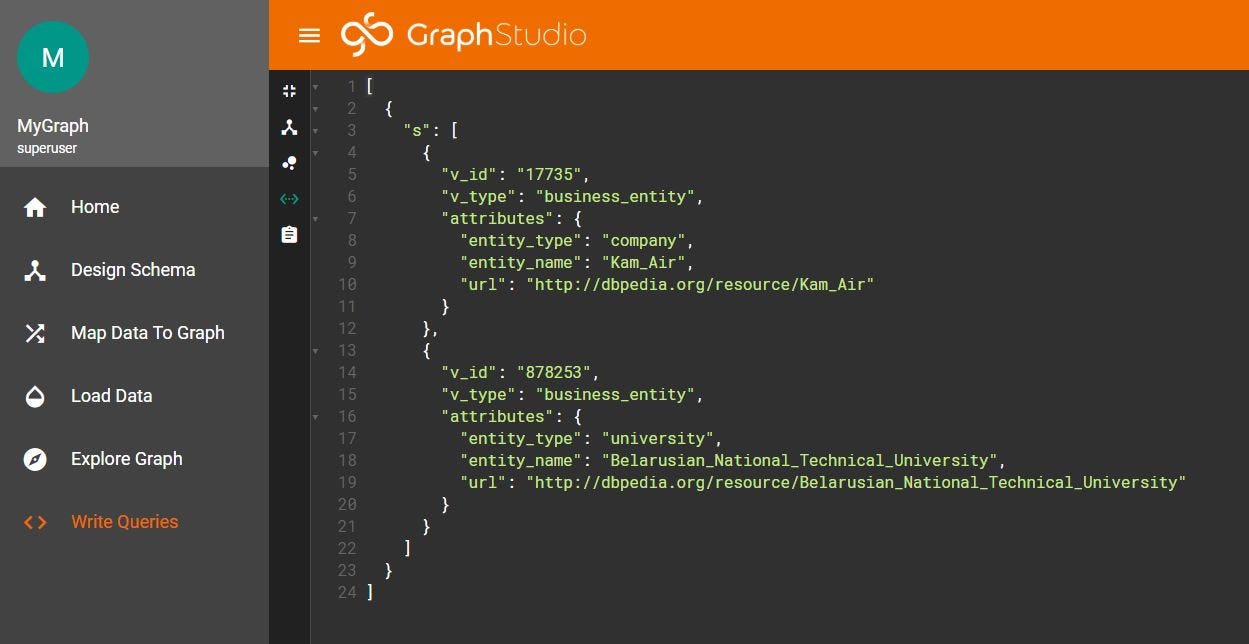
TigerGraph Studio query results
Conclusion
I hope you found this post informative. This method for linking an Alexa Skill with a Lambda function is a quick and simple way to load graph data, but this pattern could be equally applicable for more complex interactions. In a future post I will explore other scenarios like voice-activated (and touchless) patient check-in functionality or a graph search application that finds health care providers based on proximity to a user’s location.